How to paint gouache leaves.

Collage Fodder
I have been taking part in a 100 Day project called #100daysofcollagefodder .
The challenge is administered by Wendy Solganik, @willa.wanders on instagram.
I am creating different “fodder” for collaging and posting it to instagram. After a couple days of posting, my daughter asked me what ‘fodder’ was. Working in the agriculture industry my whole life, my first response was, food for cows.
The artist in me loves to take all my bits and pieces and combine them into art journals and scrapbook pages.
Fodder for me is art-food.
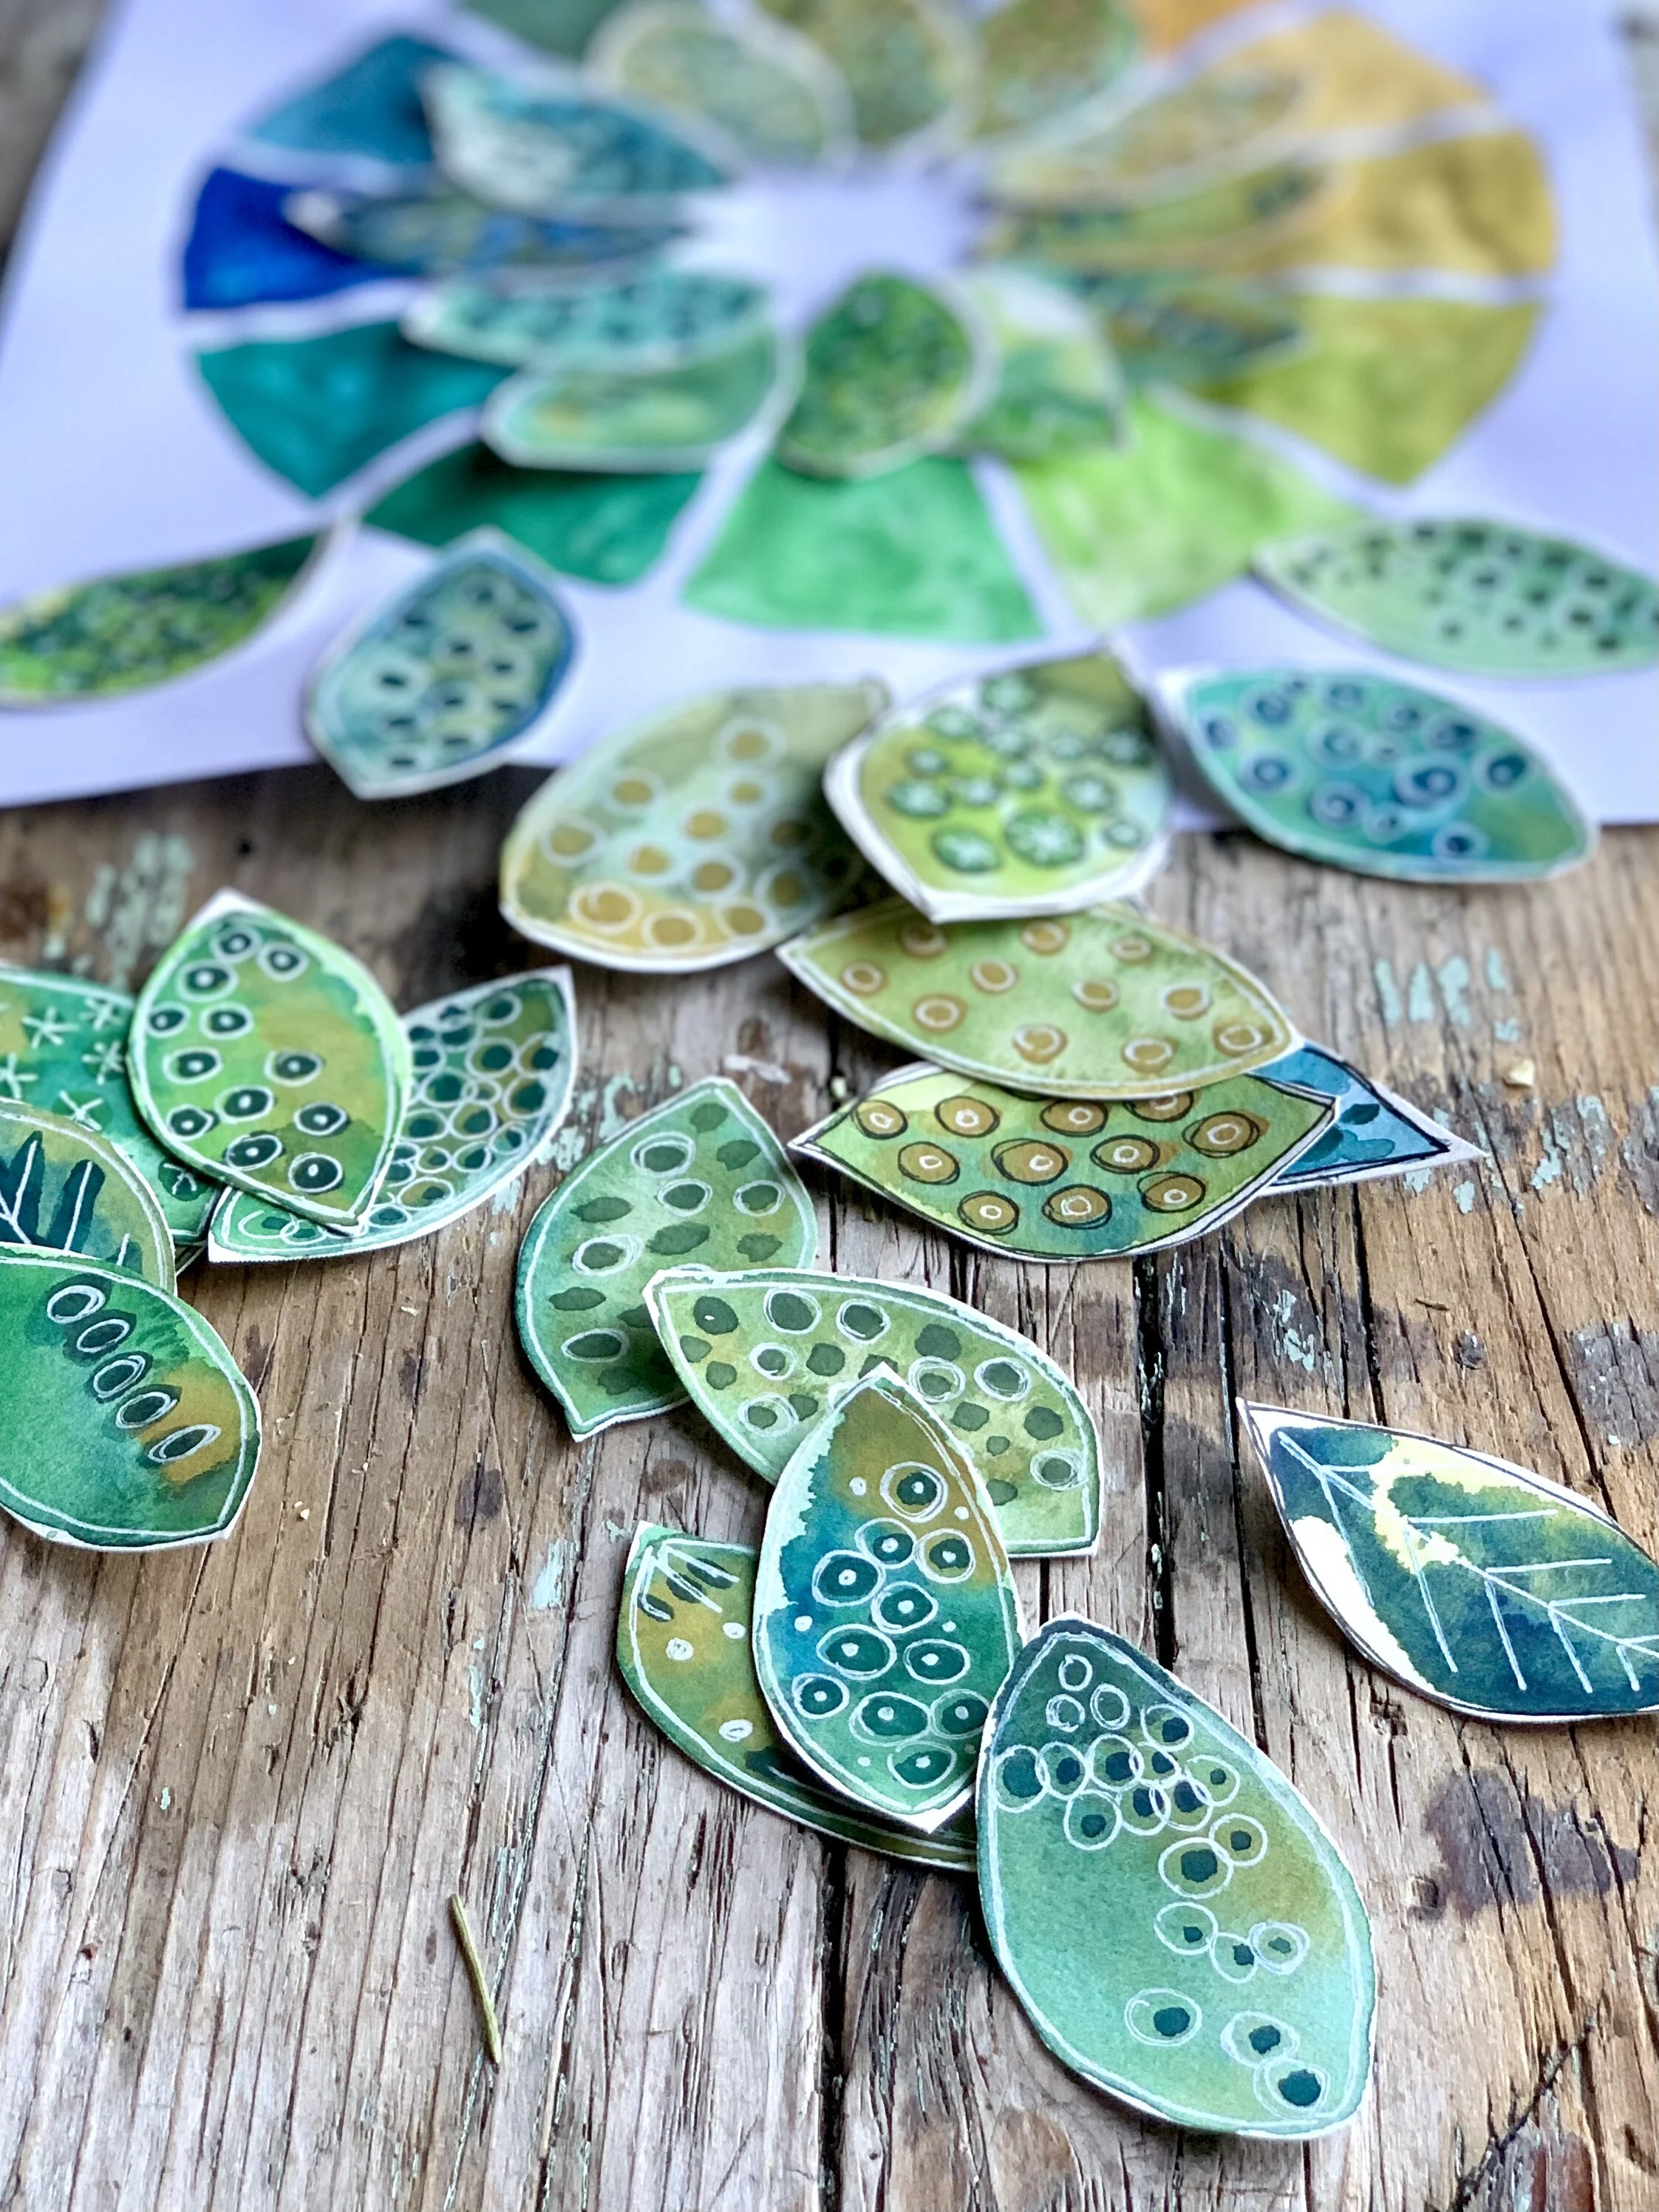
Everyone loves a good gouache leaf.
The instagram post I made with my gouache leaves generated a lot of interest and questions. I have posted a process video on my Youtube channel. You can watch it below.
If you learned something new give me a thumbs-up and don’t forget to subscribe to my Youtube channel.
How to create leaves.
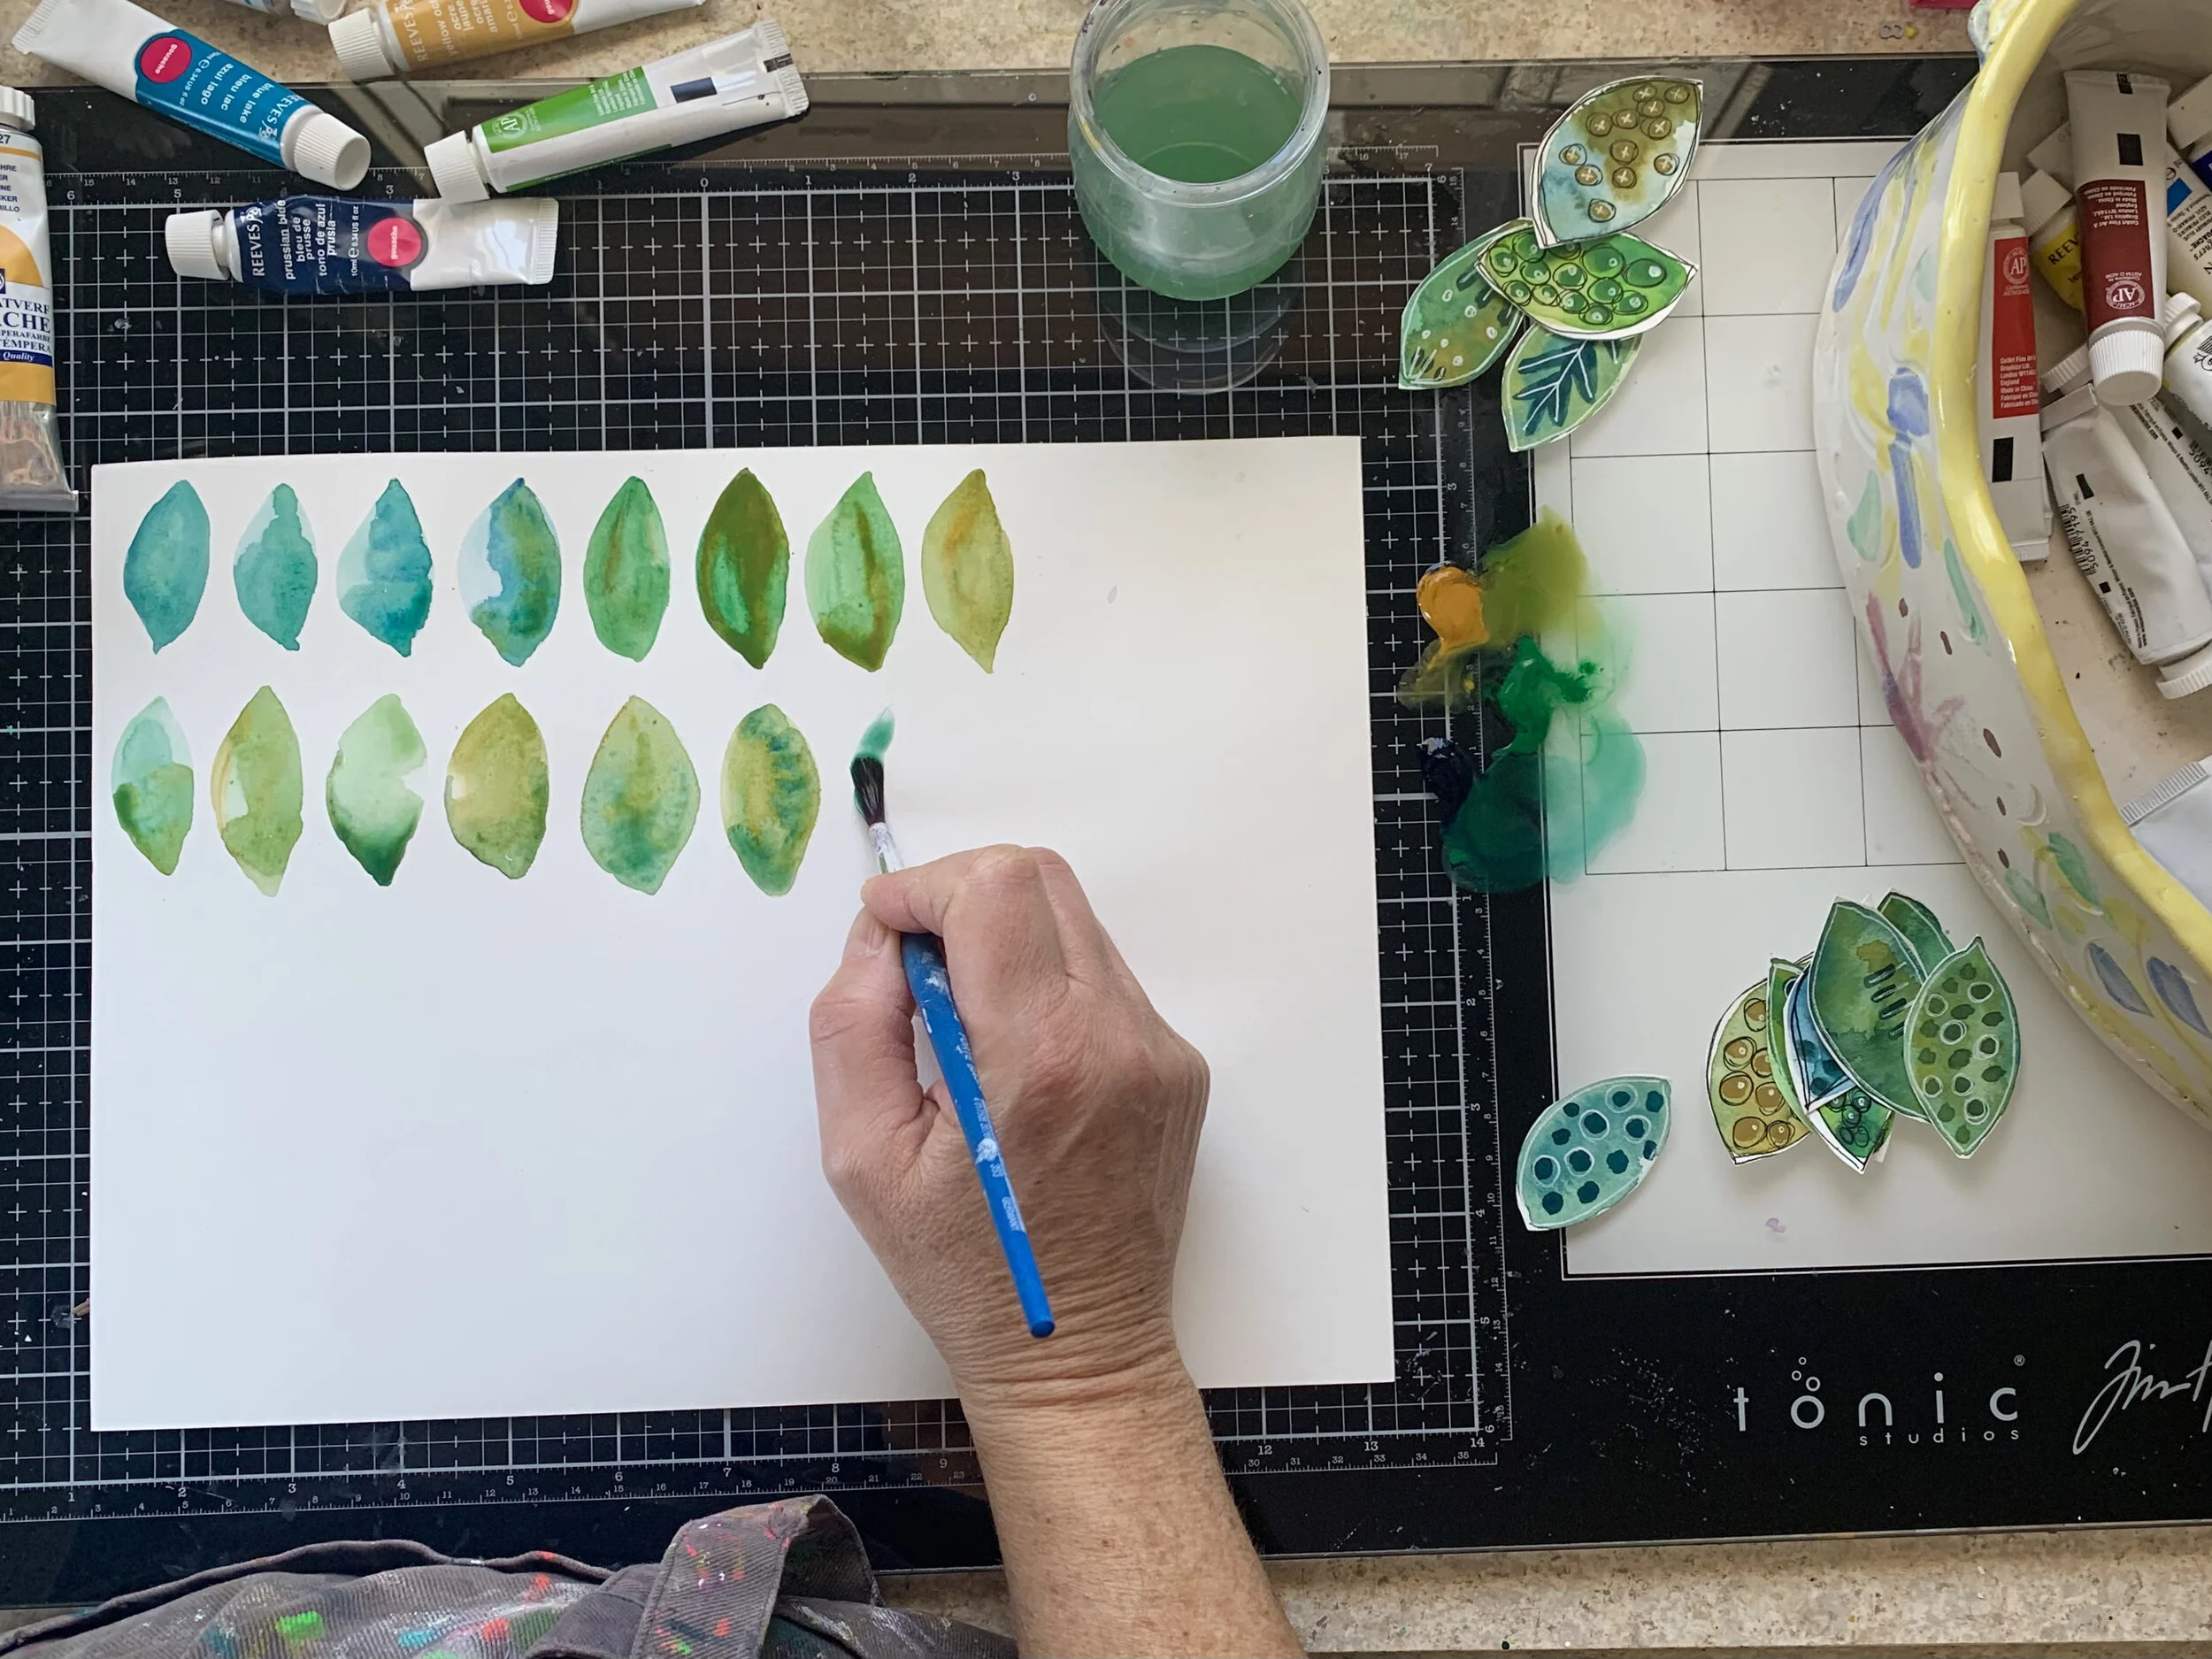
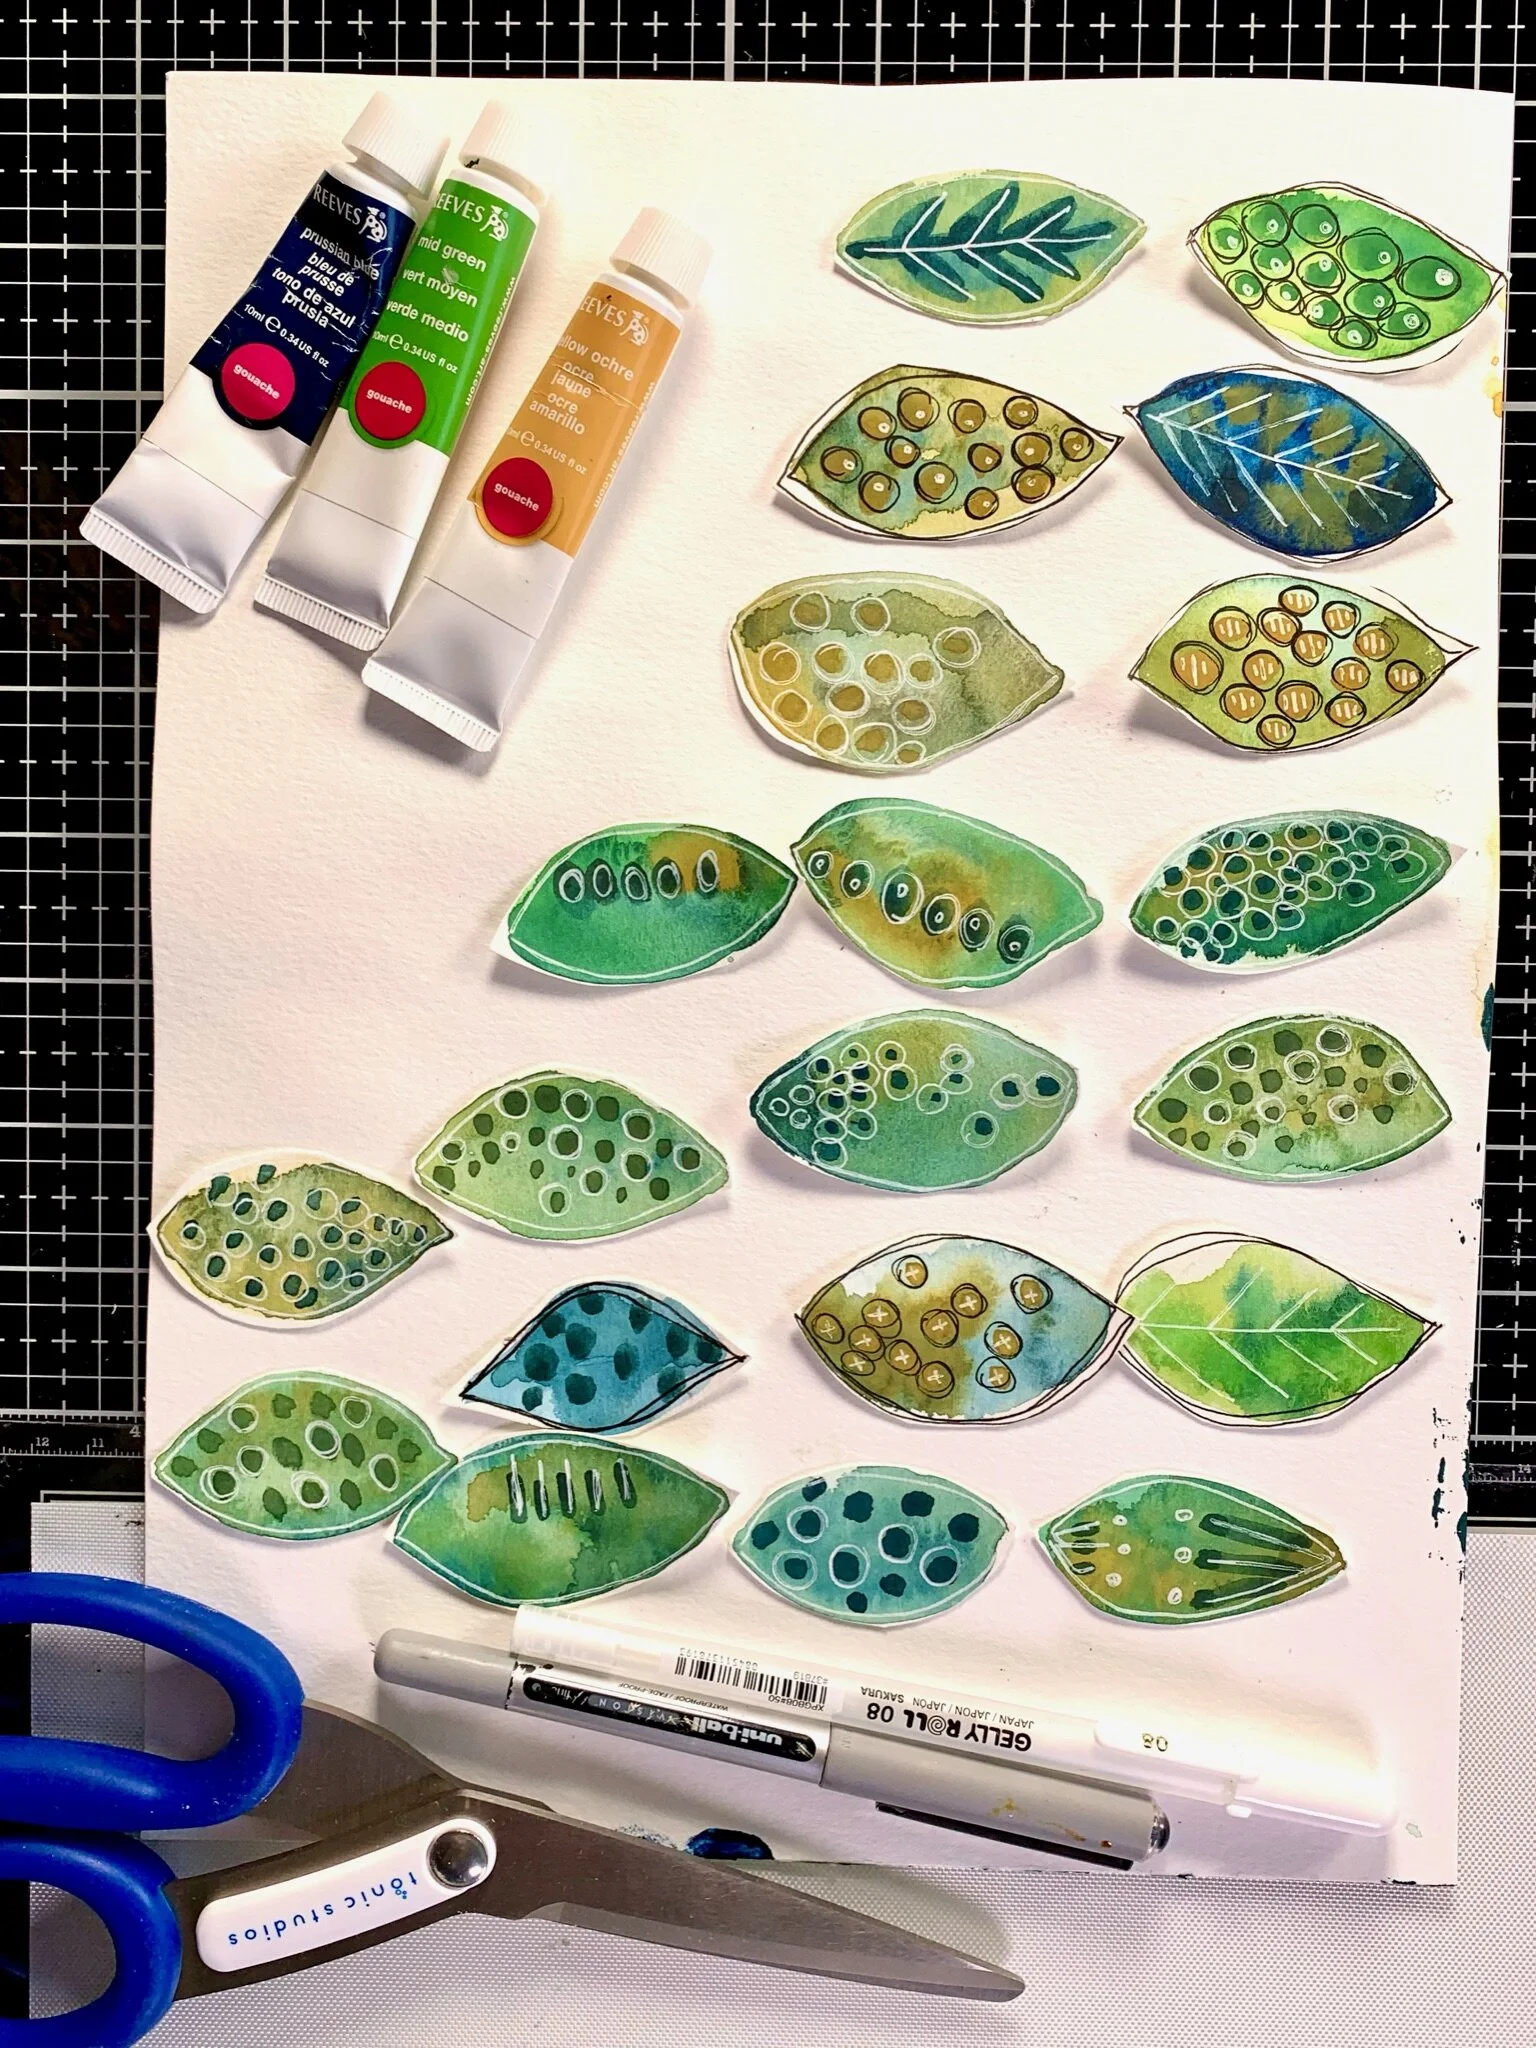
To paint my leaves I used gouache paint (I used a craft quality paint by Reeves) in Ocra , Prussian Blue and Mid Green. I blended the base colours to create many more colours.
I used Canson watercolour paper as my base.
The fist layer of the leaves is painted with a watered down gouache in a tear shape. Keep the brush wet and let the paint swim within your shape. Add in a second, watered down colour and let it bloom within your shape. Let it dry.
The second layer is created using more opaque paint (don’t water it down as much). Using your brush create marks (circles and lines) on top of the leaves.
The final layer is doodled using a white gel pen and a black pen. I used the Sakura Gel pen and a Uni-ball Vision.
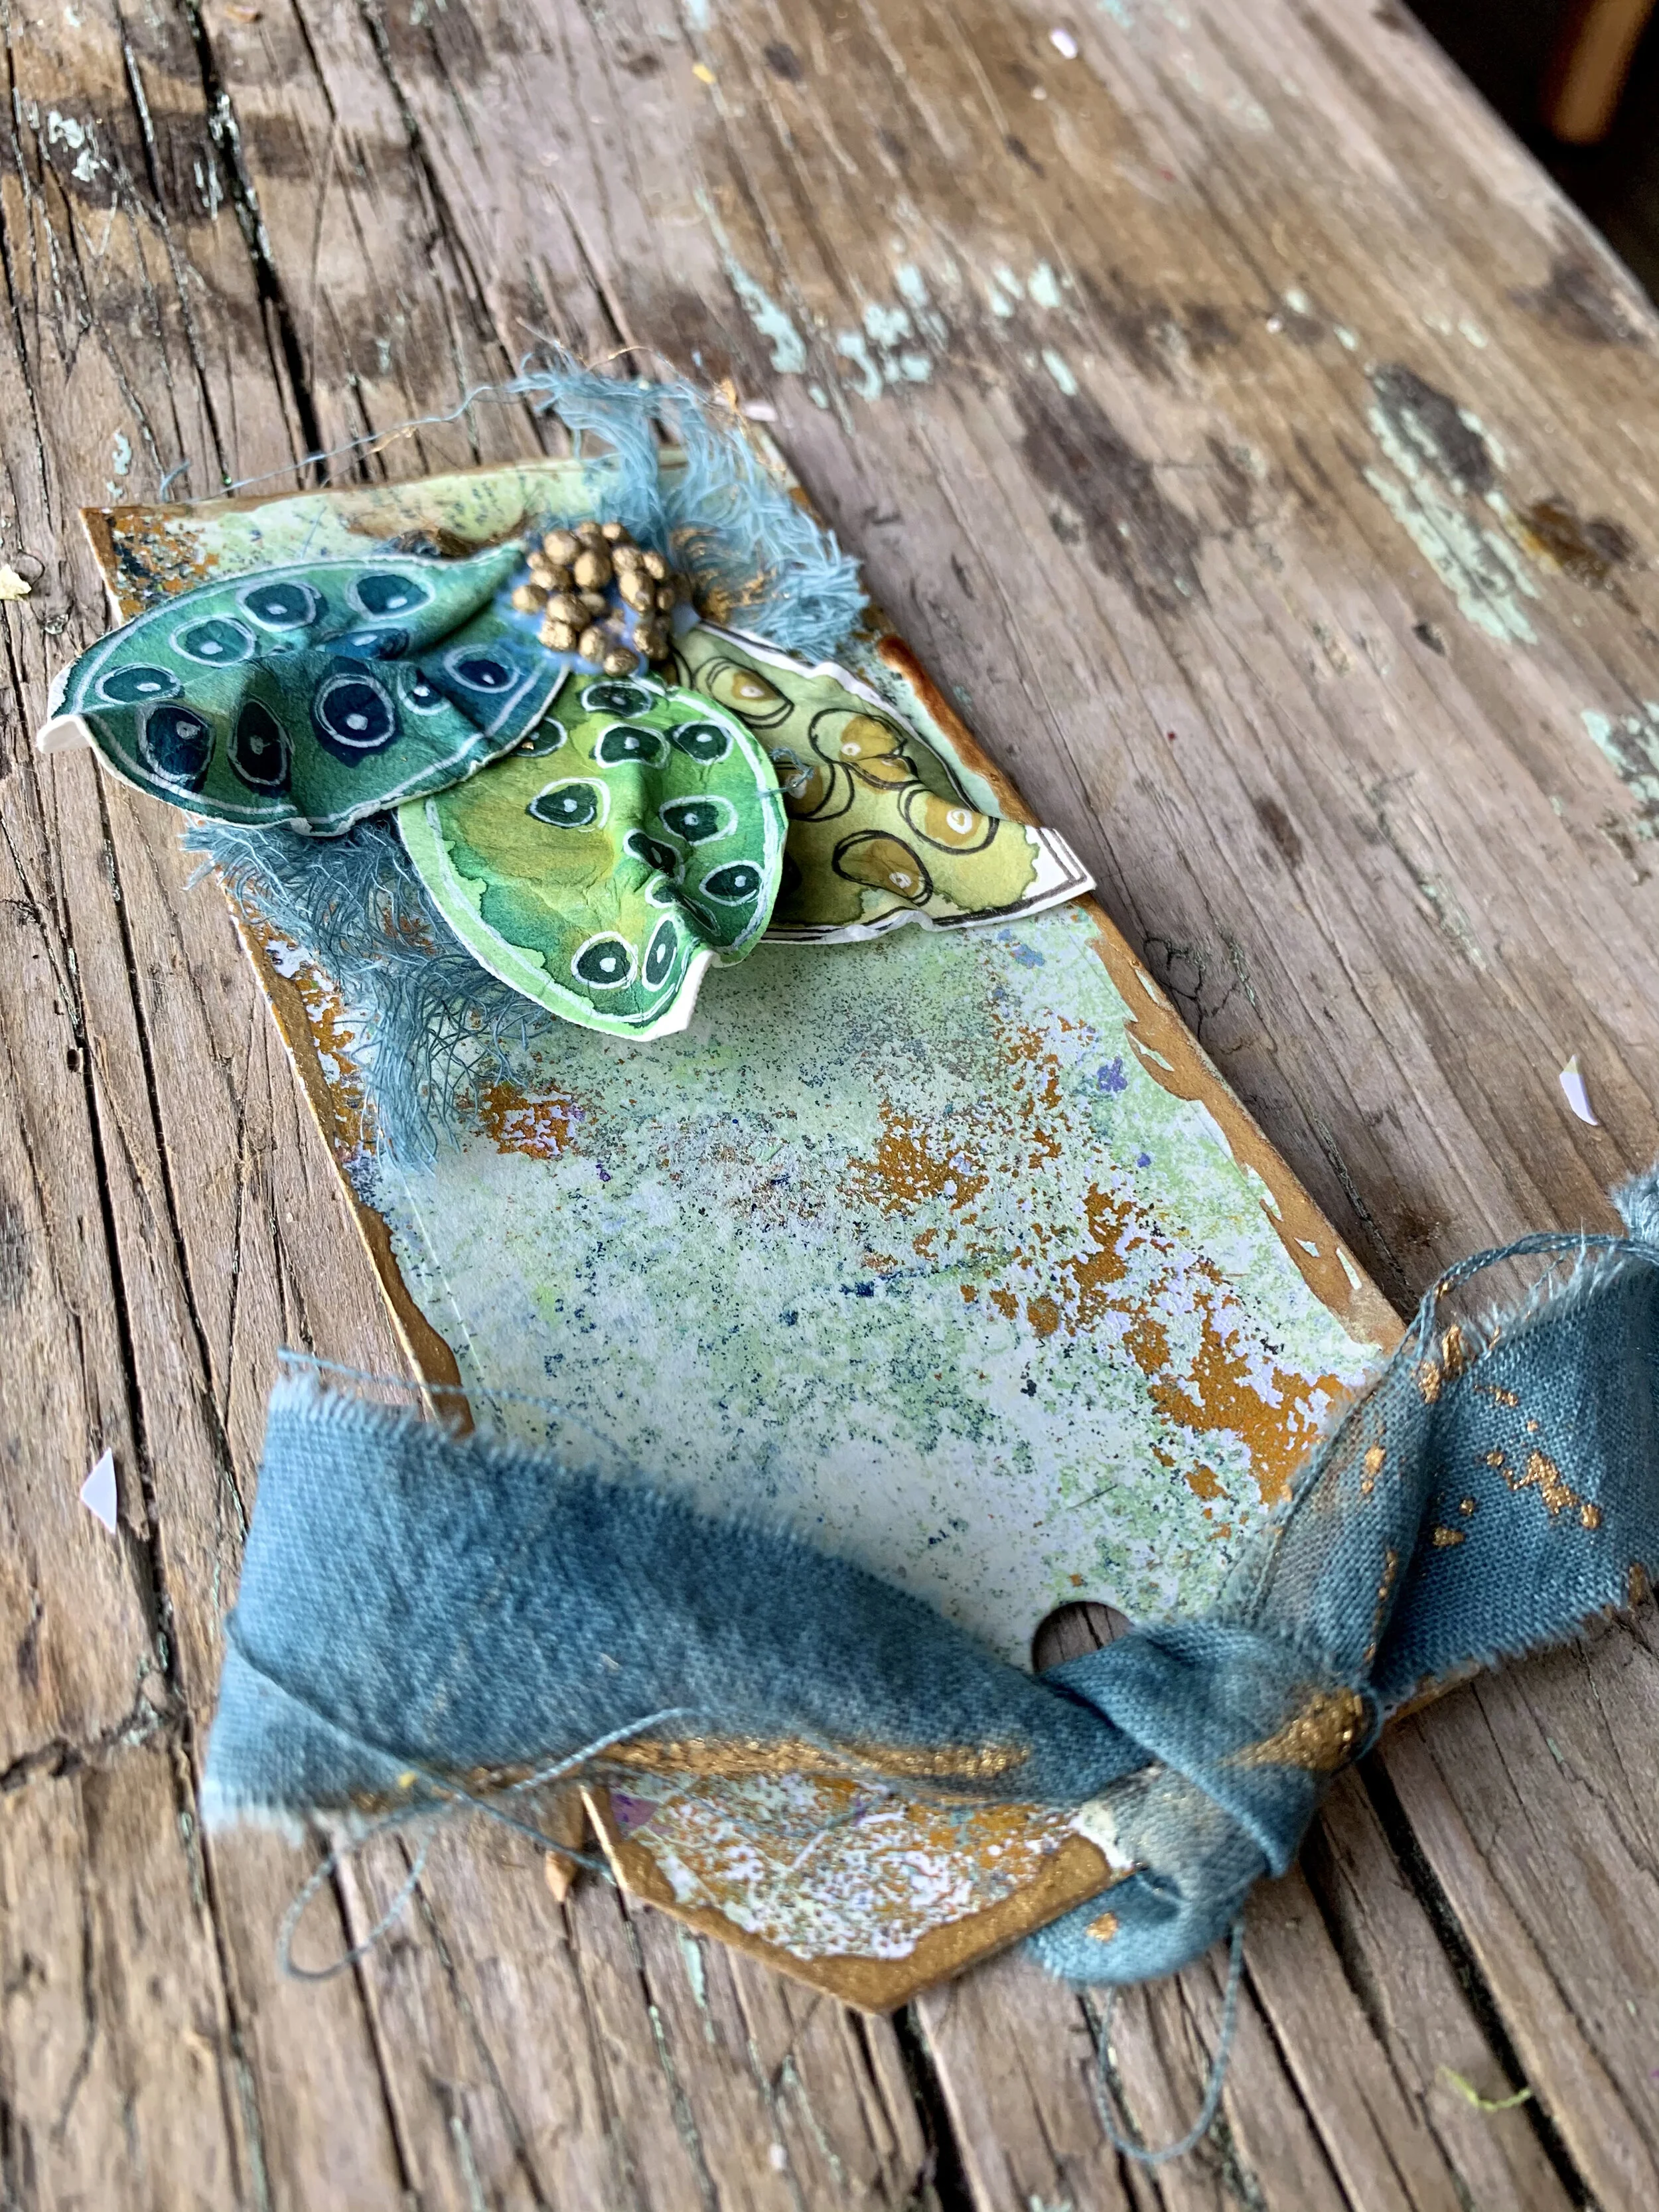
The leaves are very sturdy. To create the tag I spritzed them with water and squished them into three dimensional leaves.
The ribbon on the tag is made with my hand-dyed ribbon, you can purchase it here.